

What You'll Need:
a plain tee or tank
Elmer's Glue Gel- the blue one!
tub/bucket/sink for dying
a flat surface such as a storage bin lid for drying/designing
fabric dye
What To Do:
First, soak your tee in water and completely wring it out. Place it over the lid or other flat surface.

Use the glue to draw your design on your tee. This part of the tee will remain the same color as the fabric. Make your designs clear and spaced-out in case the glue spreads a little bit. Leave the shirts flat to dry completely. If you want to add something to the back, be sure the front is completely dry before adding the design to the back.
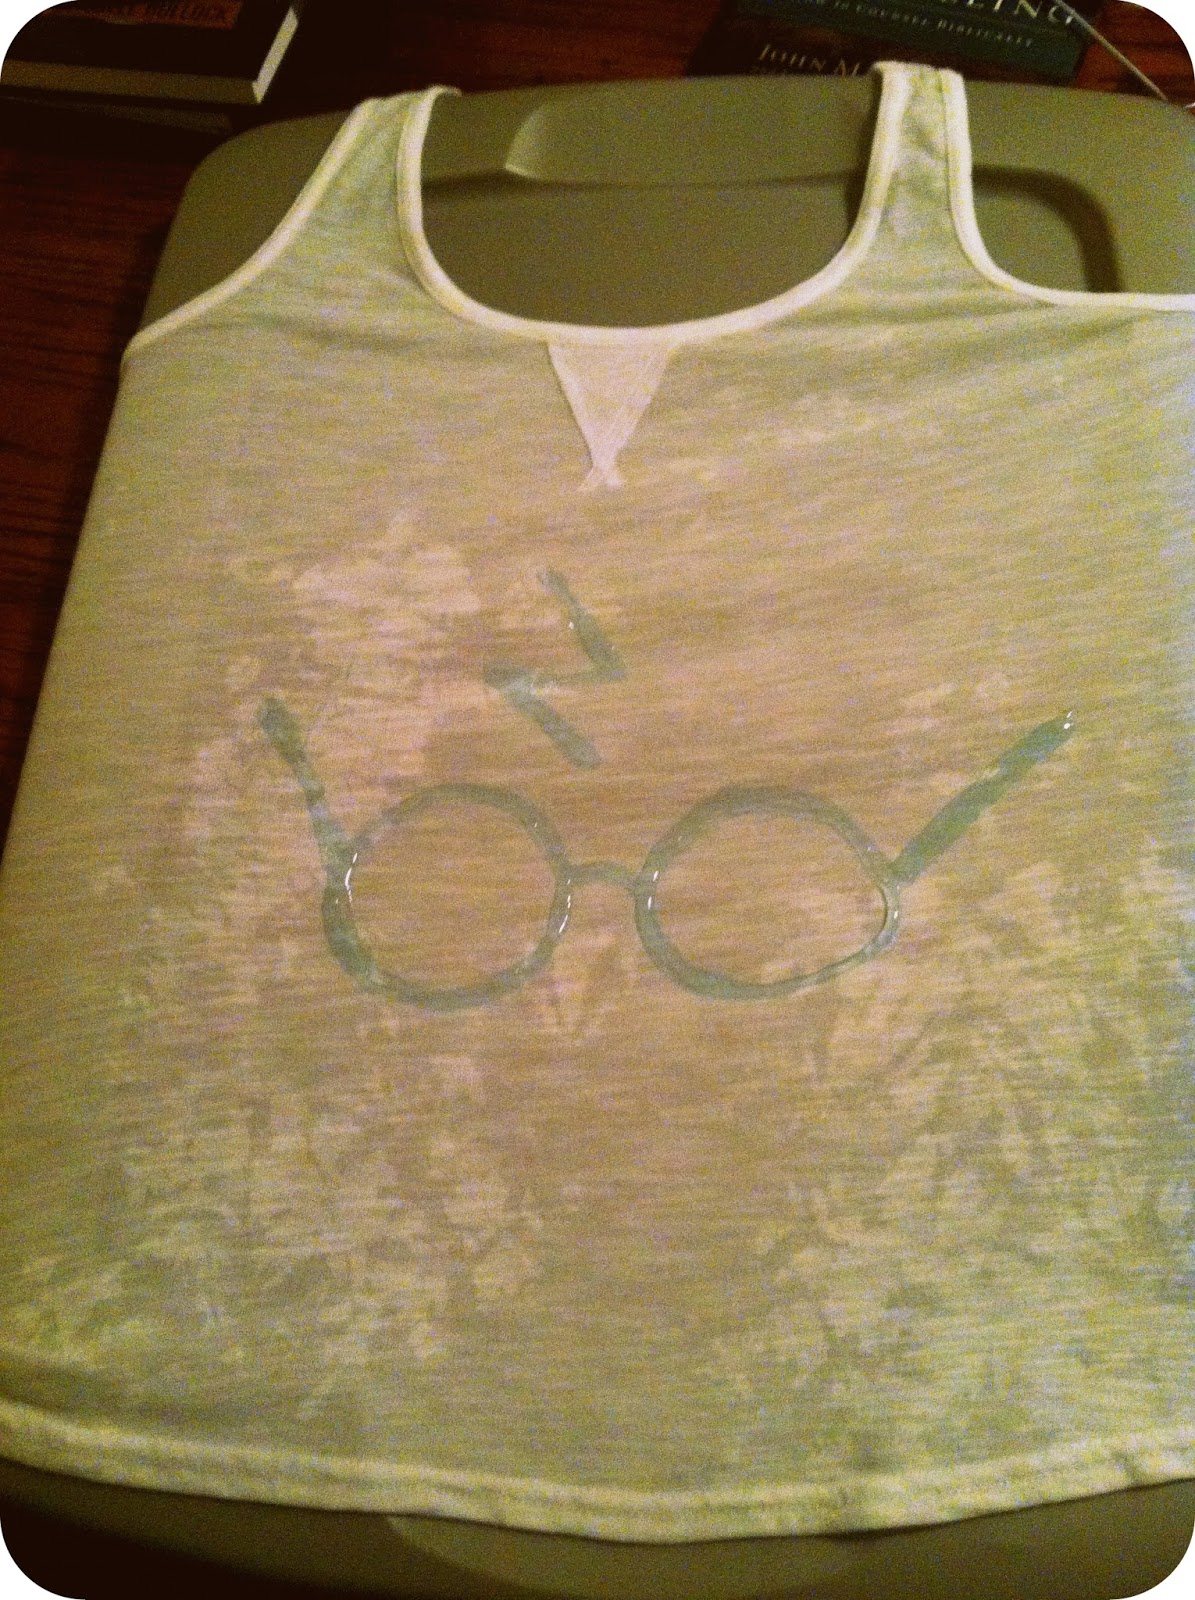

Obviously my design would have benefited from a pencil sketch to begin with- the pencil will wash out later if you want to draw out a design in pencil first.

Allow the shirt to completely dry. Once dry, prepare your dye bath. We used Rit dye to achieve the colors we wanted. I used teal and Lindsey used a combination of tangerine and scarlet. Soak the shirts for 10-30 minutes, depending on how rich you want the color to be.

Wring your shirts out and lay flat to dry. Once dry, rinse for about fifteen minutes in a bath of cool, soapy water. Then wash and dry in the washing machine like normal.
Ta-da!

My glue dripped a little bit during the drying process because I did not dry it flat #epicfail but you can learn from my mistake! It's such a simple process and we will totally do this again!
Tutorial from Sweet Verbena
we made deathly hallows shirts when we went!!! it is so fun to be dorky!!!
ReplyDelete