Showing posts with label breakfast. Show all posts

Monday, April 14, 2014

baked french toast


Although living alone has some definite perks, it also requires some creativity when food is involved. Last week I happened to have a beautiful loaf of bakery bread with no possible way to eat it all before it got stale. So instead of gorging myself on sandwiches, I added some apples and blueberries and baked up this delicious french toast! 

This recipe will yield quite a large batch of this yummy brunch bake. I only made about half of it for myself. It lends itself easily to adaptation, meaning you can sub in whatever fruit or milk products you have on hand! And oh my goodness, the way this smells as it cooks? Out of this world. You can also prep everything at night and refrigerate until you're ready to bake and serve in the morning, making it a fantastic option for when you have guests! 


What You'll Need:
  • 1 loaf Crusty Sourdough Or French Bread
  • 8 whole Eggs
  • 2 cups Whole Milk
  • 1/2 cup Heavy Cream
  • 3/4 cups Sugar
  • 2 Tablespoons Vanilla Extract
  • 1/2 cup All-purpose Flour
  • 1/2 cup Firmly Packed Brown Sugar
  • 1 teaspoon Cinnamon
  • 1/4 teaspoon Salt
  • 1 pinch Nutmeg 
  • 1 stick Cold Butter, Cut Into Pieces
  •  Fresh Fruit (optional)

What To Do:

Grease a 9 x 13-inch baking pan with butter. Tear bread into chunks (or cut into cubes) and evenly distribute in the pan.
In a medium sized bowl mix together eggs, milk, cream, sugar, and vanilla. Pour evenly over the bread. Cover tightly and store in the fridge for several hours or overnight.
In a separate bowl, mix flour, brown sugar, cinnamon, and salt. Add nutmeg if desired. Add butter pieces and cut them into the dry mixture until mixture resembles fine pebbles. Store in a Ziploc in the fridge.
When you're ready to bake the casserole, preheat oven to 350 F. Remove casserole from the fridge and sprinkle crumb mixture over the top. (If you're using fruit, sprinkle on before the crumb mixture.) Bake for 45 minutes for a softer, more bread pudding texture. Bake 1 hour or more for a firmer, less liquid texture.
Scoop out individual portions. Top with butter and drizzle with maple syrup.

Recipe from The Pioneer Woman 

Thursday, May 30, 2013

Peanut Butter Banana Waffles


Thinking about breakfast for dinner? This dish is sure to please! Peanut butter packs your waffles with flavor and protein, and pairs perfectly with nutritious bananas. This is a great recipe to make use of over-ripe bananas. It is a great stand alone meal but can also go great with turkey bacon (as pictured above), eggs, or fruit for a fuss-free dinner. 


What You'll Need:
2 cups unbleached all-purpose flour
1 1/2 teaspoons baking powder
1/2 teaspoon salt
1/4 cup packed brown sugar
3/4 cup smooth peanut butter
1 ripe banana, mashed
1 1/2 cups milk
1 large egg

1/2 teaspoon vanilla extract

What To Do:
In a large bowl, whisk together the flour, baking powder, salt and brown sugar. Blend the peanut butter, banana, 1/2 cup milk, egg and vanilla in a blender or food processor until mostly smooth. There may be some banana chunks still, but that is fine. (I used the beater on my stand mixer and it worked perfectly) 

Whisk the peanut butter into the flour blend. Add the milk and stir until the batter is smooth. Cook the waffles according to your waffle iron's directions, top with butter, sliced bananas and maple syrup. Serve hot!


Recipe adapted from Savvy Eats

Wednesday, May 15, 2013

Baked Eggs Rancheros


This recipe was my first introduction into baked eggs (besides breakfast pizza) and I did not expect the incredible concoction that steamed up from my oven. 

It was so, so good. Good as in my words are not going to do this justice. 

It was savory and spicy, rich from egg yolk and the hearty ranchero sauce, with crunch and cool from the toppings- just a well-rounded blend of everything good in life. 

My dish was slightly varied from the original recipe. I did not use cheese or tortilla strips... and I don't have a cast iron skillet so I had to transfer from a saucepan to a roasting pan. But I'm sure any variation on this would make a brilliant addition to the brunch rotation or even as breakfast for dinner. 

Tuesday, April 9, 2013

Baked Eggs in Avocado


Avocado. The fruit of the gods. It's probably what Eve ate because I mean look at it. It's beautiful. It's creamy. It's packed with vitamins and healthy monosaturated fats. It goes with salads, burgers, tacos, pizza (yes. try it), smoothies, condiments. 

This dish would make a fabulous addition to a brunch/breakfast spread or is delicious all on its own. Plus it's super easy, tasty, and full of protein and good fats- so it's super filling.

There are so many ways to make this even better too! Add crumbled bacon or shaved Parmesan. Scoop it out hot and spread over warm French bread. Kick it up with chipotle hollandaise or just sprinkle with cayenne pepper. 

You get the idea. 

Oh, also, I used small avocados but this recipe would definitely work better with large avocados! 


What You'll Need:
serves 2
1 large Haas avocado 
2 egs
sea salt
freshly cracked black pepper

What To Do:
Preheat oven to 425 degrees. 

Slice avocado in halve, lengthwise. Remove the seed. If necessary, scoop avocado out of the center, forming a hole big enough for the egg. Lightly salt and pepper the avocado. 

Crack an egg into each half. Again, lightly salt and pepper. Place avocado in a small baking dish , or use aluminum foil to hold the avocado upright and to keep it from spilling. 

Bake for 15 minutes or until eggs are set to your preference. 
Devour. 


Tuesday, February 5, 2013

Homemade Blueberry Sauce


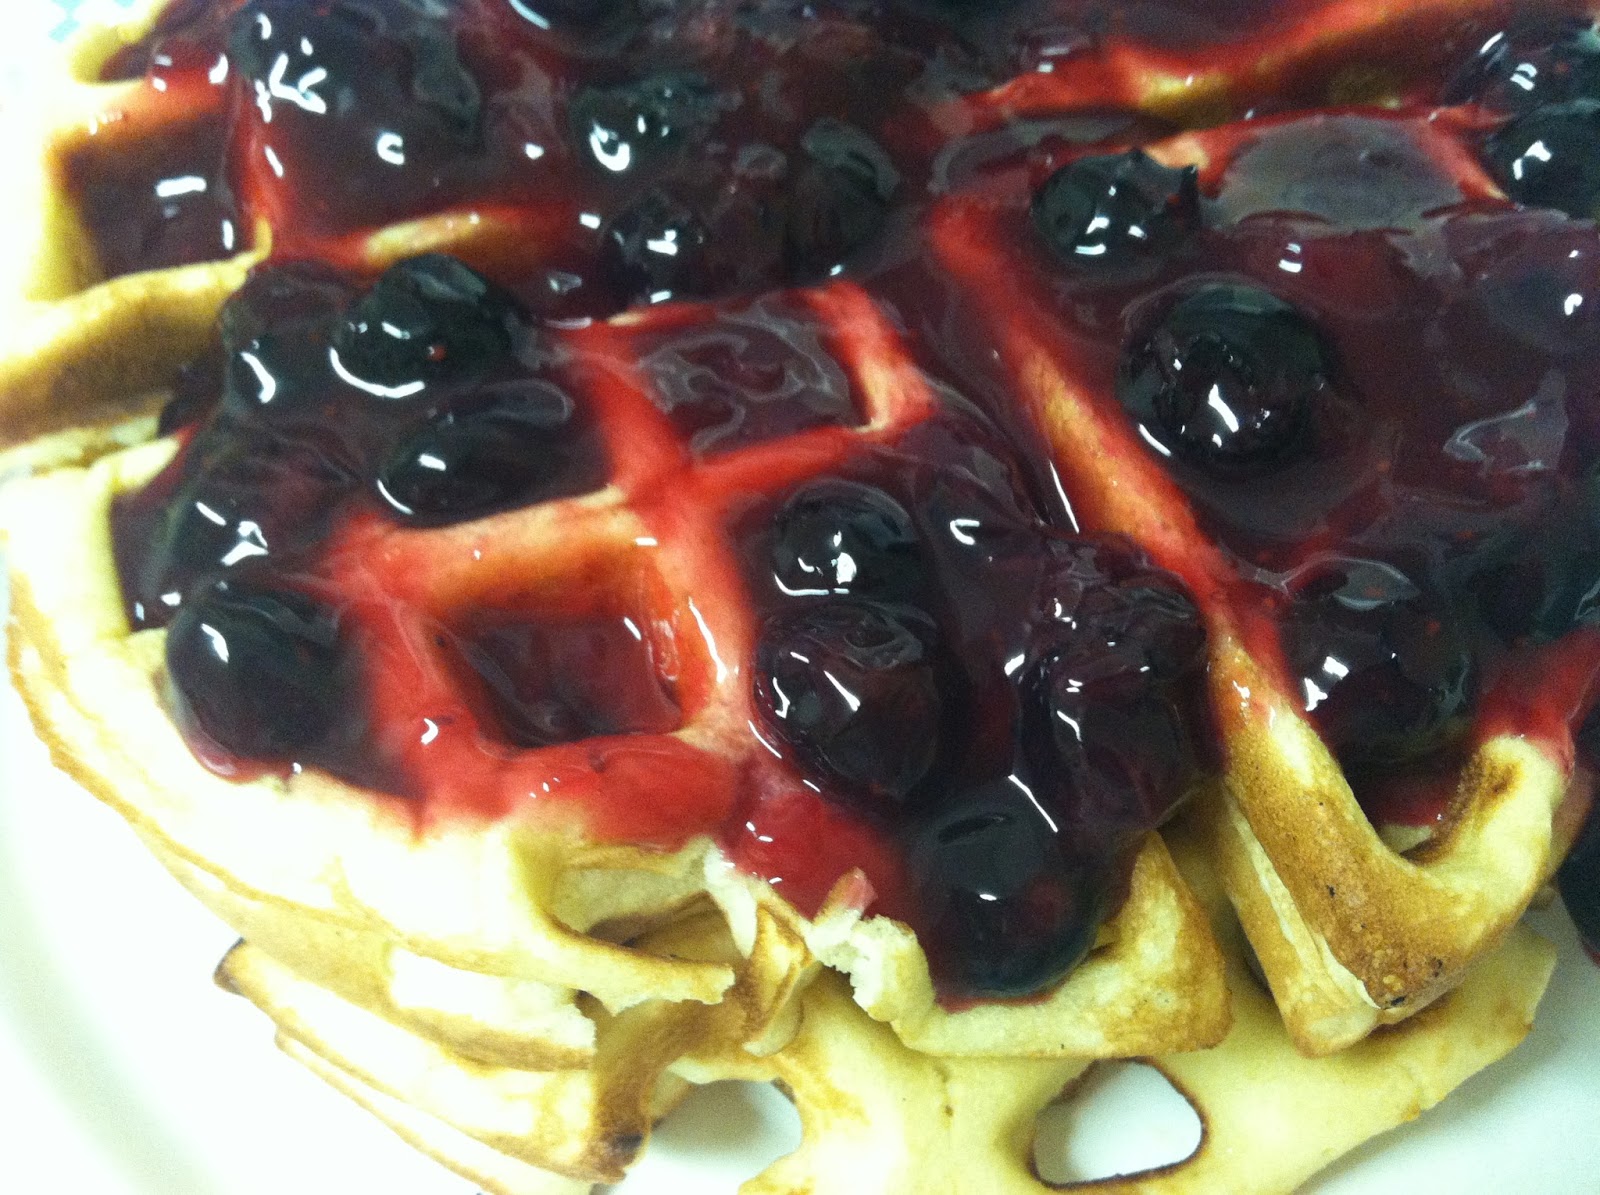
I love adding blueberries to my cereal, smoothies or yogurt, but sometimes I have a hard time finishing a carton by myself. With my last little bit I simmered them down into this delicious blueberry sauce- with no processed sugars! It would be perfect over waffles or pancakes (obviously), ice cream, or yogurt! 


It is a perfect blend of sweet and tart and I didn't feel guilty at all smothering it all over these vanilla honey waffles. Plus it only takes about five minutes to prepare so would be great for mornings on a schedule.


What You'll Need:
1 cup fresh blueberries
1 cup 100% apple juice (I used Simply Apple)
2 tsp cornstarch, mixed with 2 tsp cold water
juice of 1/2 lemon
1/2 tsp vanilla extract
optional- 1 tbsp honey

What To Do:
Add blueberries, lemon juice and apple juice to a small pot and bring to a slow boil, stirring frequently. Combine the cornstarch and cold water and pour into the pot slowly, stirring carefully as to not crush the berries. Simmer about five minutes or until the sauce has thickened. Add vanilla. Check the consistency and sweetness of the sauce and adjust accordingly- adding honey for sweetness or more apple juice to thin out the sauce. Serve over waffles or your favorite treat! 


inspired by My Baking Addiction

Monday, December 31, 2012

Cast Iron Skillet Cinnamon Rolls (without yeast)


My mom and I had big plans for Christmas cinnamon rolls. We've always just kinda used the Pillsbury canned kind and this was the first year we were going to make them from scratch. I suggested the Pioneer Woman's version but then we decided on a recipe that just made one batch. Well, Christmas Eve came and we discovered that despite multiple trips to the grocery store in the preceding days, there was no yeast in the house. So, after some quick research we found this recipe which does not require any yeast! That means there's no crazy steps of letting the dough rise and then kneading and then waiting for it to rise again. Which was just fine with us :)


Now these were a little less fluffy than your typical cinnamon rolls, but were still soft, bathed in ooey-gooey cinnamon sugary butter, and reheated really well. Plus the icing is basically a cream cheese frosting... which I love. Oh, and better than the canned, processed kind if you have a few minutes to put them together. 


What You'll Need:
for the rolls:
2 1/2 cups all purpose flour, plus extra for the counter
2 Tablespoons white granulated sugar
1 1/4 teaspoons baking powder
1/2 teaspoon baking soda
1/2 teaspoon salt
1 1/4 cups buttermilk
6 Tablespoons unsalted butter, melted
for the filling:
3/4 cup packed dark brown sugar
1/4 cup white granulated sugar
3 teaspoons cinnamon
1/8 teaspoon salt
1 Tablespoon unsalted butter, melted
for the frosting:
4 oz cream cheese, softened
4 tbsp butter, softened
1/2 teaspoon vanilla
1.5 cups confectioner's sugar
1 Tablespoon milk
What To Do:
1. Preheat the oven to 425 degrees F. Generously coat your cast iron skillet with vegetable oil spray. You could also use a 9" round cake pan.
2. First make the filling. Combine together the brown sugar, 1/4 cup granulated white sugar, cinnamon, salt, and the 1 Tablespoon melted butter until the mixture resembles wet sand.
3. Then, make the dough: In a large bowl, whisk together the flour; 2 Tablespoons white granulated sugar, baking powder, baking soda, and salt.
4. In a separate bowl, whisk the buttermilk and 2 Tablespoons of the melted butter together.
5. Stir the buttermilk mixture into the flour mixture with a wooden spoon until absorbed, about 30 seconds. 
6. Turn the dough out onto a generously floured counter and knead until smooth, about 1 minute.
7. Press the dough out into a 9 by 12 inch rectangle using your hands or a rolling pin.
8. Brush the dough with 2 Tablespoons melted butter. Sprinkle the dough evenly with the filling, leaving a 1/2-inch border. Press the filling firmly into the dough.
9. Loosen the dough from the counter using a bench scraper or a metal spatula.
10. Starting at a long side, roll the dough, pressing lightly, to form a tight log.
11. Pinch the seam to seal. Slice the dough into 8 even pieces. (The more even each roll, the more evenly they will cook!)
12. Place the slices in the greased skillet.
13. Brush with the remaining 2 Tablespoons melted butter. Bake until the edges are golden brown, 20-25 minutes.
14. Meanwhile, in a stand mixer combine all of the ingredients for the cream cheese icing until fully combined and smooth. 
14. Let cool for 10 minutes before frosting with cream cheese icing. Serve warm!
recipe adapted from Moms Who Think
and because I'm a little weird, this is a little video I took as I oohed and aaahhhed over the yummy smell and bubbling deliciousness


I know that Christmas is over, but this is the perfect breakfast treat for any cold Saturday morning. You have to leave a little wiggle room in your New Years Resolutions, and there's a lot of winter left :) These completely fill your home with a delicious cinnamon sugar fragrance and warm happiness. I'm not even kidding. These fill your home with happiness. 

Tuesday, December 11, 2012

Crock Pot Peppermint Mocha


I made a batch of this Peppermint Mocha for a day-long finals study session. I loved that I could whip it up the night before, refrigerate and then keep it warm in the crock pot the next day. I also loved that I had most of these ingredients on hand, saving me some serious money that I could have spent at a coffee shop. I made double this recipe and adjusted flavors by taste. I used instant coffee, 2% milk and heavy cream, and a mix of white and semi-sweet chocolate chips. SO GOOD.

It is creamy and sweet, with a hint of refreshing peppermint. A reminder of this sweet, refreshing season. Christmas in a cup. 

One of my favorite family traditions is our Christmas Eve brunch. We go all out with bacon, sausage, eggs, hashbrowns, scones, quiche, kolaches, French toast, and/or cinnamon rolls. This peppermint mocha would be a fantastic addition to our traditional feast (if any of my other family members would drink it, that is)

It would be great for Christmas mornings too!


What You'll Need:
  • 4 cups milk
  • Either 4 shots of espresso, 4 rounded teaspoons instant espresso powder plus 1½ cups water, or 2 cups very strong brewed coffee
  • ¾ cup semi-sweet chocolate chips
  • ¼ cup peppermint syrup
  • Whipping cream and shaved chocolate bar for garnish

Peppermint syrup
  • 1 cup sugar
  • 1 cup water
  • 2 teaspoons peppermint extract
What To Do:
  1. First prepare the peppermint syrup. In a small saucepan over medium heat, bring the water and sugar to a boil, stirring until sugar is dissolved. Remove from heat and stir in the peppermint extract. Store in an airtight container in the refrigerator for up to 3 months.
  2. Make your peppermint mochas: In a 3-quart or larger slow cooker/Crock Pot, stir together the milk, espresso/coffee, chocolate chips, and peppermint syrup.
  3. Cook covered on low for about 2 hours, stirring occasionally to help distribute the melting chocolate, until steaming. You can also cook it on high for about an hour and fifteen minutes (depending on your slow cooker), stirring often – just watch it a little more carefully when the slow cooker is on high. Reduce heat to warm and keep covered once the mocha has heated to steaming. Taste and adjust flavors as desired. 
  4. Serve in festive mugs, topped with whipped cream and garnish with a candy cane, chocolate shavings or a sprinkle of cocoa. Enjoy your Christmas in a cup.


recipe from Kitchen Treaty


Tuesday, September 18, 2012

Sweet Potato Quinoa Skillet


For someone who loves a good steak, I sure have been lovin me some meatless meals. 

This meal does include bacon crumbles as well as vegetables cooked in bacon drippings, but it's the quinoa, egg, and black beans that provide the protein! This flavor combination is fantastic. It's warming without being too heavy, healthy-ish without being pretentious, and perfect for fall. 

I subbed a couple of things from the recipe at Jessica's blog and either way, this is definitely a winner. It can be eaten as breakfast, lunch or dinner, and is sure to please even your picky eaters. Hope you enjoy!


What You'll Need:
serves 2
  • 2 slices thick-cut bacon, chopped 
  • 1 small sweet potato, chopped 
  • 1/2 onion, chopped 
  • 1/2 jalapeno pepper, chopped 
  • 2 garlic cloves, minced 
  • 1/2 cup uncooked quinoa, rinsed
  • 1/2 cup black beans, rinsed 
  • 1 cup low-sodium vegetable or chicken stock
  • 2 eggs, cooked your desired way 
  • salt and pepper to taste


What To Do:
Heat a large skillet over medium heat and add bacon. Cook until fat is rendered and bacon is crispy, then remove bacon with a slotted spoon and place on a paper towel to drain. Reduce heat to medium-low and add sweet potato, onions, pepper, and garlic to the skillet, tossing to coat. Cover and cook for 5-6 minutes, stirring once or twice, until soft.

Add uncooked quinoa to vegetables and stir for 1-2 minutes, allowing it to lightly toast. Pour in stock and bring the mixture to a boil. Immediately reduce to a simmer, cover and cook for 10 minutes. Stir in black beans, and continue to cook for five more minutes or until quinoa is cooked through. While quinoa is cooking, prepare eggs as you'd desire. Once cooked, taste and season to your liking. Serve quinoa in bowls topped with eggs and cooked bacon.


recipe adapted slightly from How Sweet It Is

Thursday, September 13, 2012

DIY Caramel Syrup


I posted Monday about a cheap and delicious way to make iced coffee. I take mine to class with me every morning in my cute purple tumbler- with ice, half and half and two tablespoons of this goodness.

Of course you can buy your own flavored syrup. But this is SO simple, and you control what goes in it. I know that this recipe calls for A LOT of sugar but just remember that you don't use very much at once. It blends better than straight sugar or artificial sweetener in this liquid form. 

What You'll Need:
1 cup water
1 1/2 cup sugar
1/2 cup caramel sauce

I used this caramel sauce. You can make your own too! 


What To Do:
Combine ingredients over medium heat. Stir frequently until sugar is dissolved and mixture is smooth. Remove from heat and allow to cool. Store airtight in refrigerator. 

Add to coffee, lattes, milkshakes, etc!


Recipe from Annie's Eats 

Monday, September 10, 2012

DIY Iced Coffee


Friday I posted some of my favorite pumpkin spiced treats. If you haven't checked those out yet, definitely head over there and pin a couple things for later. Because lemme tell ya, they are pretty dang good. 

Now, I also clarified that it's going to be pretty warm around here in Texas for quite a while. This fantastic DIY iced coffee has been part of my morning routine since school started and I love it. It's very inexpensive and depending on your coffee intake, can last a while! My first batch (which was not a full pound) lasted me two weeks, drinking a glass of iced coffee every day. That means each serving cost me about $0.57 (before half and half and syrup). If I bought a plain iced coffee at Starbucks, it's $2.65.  Made at home= $8 total. Bought at Starbucks= $37 total. That difference adds up pretty quick! 

This cold brewed coffee also is much less acidic than your regular ol' drip coffee which is definitely easier on my stomach!

Now I realize that everyone and their mother has seen the Pioneer Woman's recipe from whence this came but I wanted to show anyone wavering on whether or not to try this out that it's well worth it. 

What You'll Need:
1 lb ground coffee (darker and richer is better)
2 gallons water
2 large containers to hold water and coffee
strainer/colander
cheesecloth/paper towels 

What To Do:
First, take your ground coffee and pour it into a large container. I used a gigantic mixing bowl. I've also used a soup pot to do this. I believe Ree uses a large plastic container.


Then pour the water over it and mix together so that all of the grounds are wet.


(It bubbled up and reminded me of the movie The Labyrinth. 10 Points if you can tell me why!)

Cover this mixture and let it sit for at least eight hours. I left mine overnight. 
Whenever you're ready to move on, get ready to strain your mixture!  Prepare another large container and place your strainer over it with a cheesecloth in it. I don't actually have a fine mesh strainer or a cheesecloth so I took my giant soup pot and placed it in the sink. Then I set my colander over it and covered it with two paper towels (side by side). I used Brawny paper towels and they never ripped, they allowed the liquid to strain through and did not allow coffee grounds to leak out. Perfect.

If your strainer/colander is large enough, pour your entire mixture into it and let it strain. It will take a while.


If you're like me and it is not big enough, use a cup to start scooping liquid into the colander to strain.


Since the container I was straining the liquid into wasn't large enough to hold all the liquid, I stopped halfway through to pour it into my quart size mason jars. Once you've completed the reminder of the straining process, discard the coffee grounds and refrigerate your iced coffee concentrate!


Store airtight and refrigerated in Mason jars, pitchers with lids, storage containers, etc. Unfortunately none of my pitchers have lids, so this is how I store mine! 

[Please note my ridiculously tiny counter space. Also note the yellow splatter painted microwave. Yeah, that's the work of my sister. Does anyone know anything about removing paint from appliances? ]


Ice, add cream and sweeteners, and enjoy! 

Stay tuned for instructions on making a delicious caramel syrup to add as a flavored sweetener to your iced coffee! 

Friday, September 7, 2012

pumpkinmania


One of fall's most celebrated flavors is pumpkin! Well, it's still a good 105 degrees where I am so I won't be partaking in fall flavors and dishes for a while. I'm squeezing every last drop out of fresh tomatoes, corn on the cob and bright berries. But since everyone not located in the furnace of the US is getting ready for autumn's debut, I thought I'd share some of my : 

(previously published)
tried and true
absolutely delicious
make-your-kitchen-smell-like-heaven
pumpkin treats 

Pumpkin Cream Cheese Muffins


Don't let the ridiculously low quality photos fool you. I just haven't had one of these treats sitting around long enough to take a good picture ever since I figured out how good ALL of these are. I eat them while they're hot. (where applicable haha)

Cheers to cool weather, yall! 

Thursday, July 12, 2012

The Last Thing I...

Hey y'all!


It's my first ever Last Things Thursday! I'm linkin up with Jenna at the Life of the Wife. She has an adorable blog and a super snazzy jewelry shop! So here goes...

The Last Thing... 

That Scared Me To Death

(photo from here)

It has been storming the past few days in Austin. Well on Monday night, we ducked in from the rain into a little Chinese restaurant. As we were finishing up and getting ready to leave, I took the trash over to the trash can. I was looking out of the front windows when lightning struck an electric pole VERY close to where we were.  It caused a huge and bright explosion. All of the electricity went down. It was like a scene from a movie! Everyone gathered around the window in awe. It was then that we realized the lightning struck the electric pole with transformer boxes. Because there was a second explosion. So we decide to get out of the area as quick as we could! As we were driving away, the last transformer box blew up and the pole caught on fire. It was crazy!! Thankfully, the fire department responded before we were even out of the area and electricity was restored quickly. I'm just so grateful that nobody was hurt!


I Cooked for myself


Breakfast Pizza for a late dinner last night! Quick pizza crust brushed with olive oil, and topped with shredded white cheddar and mozzarella cheese, Canadian bacon and a couple of eggs cracked over the top. Bake til crust is crisp and eggs are over medium. Delish!

I Lost at


After we (the youth group and I) had some tacos and enchiladas at Get LOW (lunch on Wednesday) at the church, we played Taboo. I LOVE Taboo. David and I get really competitive because we're both pretty dang good (not bragging but we can each get 7 cards per turn). So we each captained a team of students and it came down to me on the last round. I needed three to tie or four to win, and our team got stuck on the word "PC"! PC?! So we got three, tied it and had to go into sudden death. 

David rocked his sudden death round. He got six. I epically failed my sudden death round. I think we got two. But it was all in good fun, my team rocked, and everyone enjoyed the game! And then we moved on to floor pong!

Got Stuck in my Head


Brady Davis led worship for my college ministry and has been at our youth camp leading worship the past two years. He has just released a secular, solo EP called Life and Death. I love the country, folksy sound and the thoughtful lyrics. I've had The City on my Spotify for weeks and I cannot get it out of my head.  Check out his whole EP and free downloads here. 

Got Excited About


My dad is turning fifty this weekend (!) and to celebrate our entire extended family is coming to New Braunfels, Texas for a weekend of good food, Schlitterbahn and lazy river afternoons on the Guadalupe and the Comal. I love Schlitterbaun- the use of the river water and it's so shaded and they let you bring your own food! It's just a great waterpark.

 I am attempting this cake so stay tuned for photos and my adaption of the recipe!

Hope y'all have a great weekend, because I know I will!

Related Posts Plugin for WordPress, Blogger...