Showing posts with label dessert. Show all posts
Thursday, April 3, 2014
Chocolate Chip Cookie Dough Fudge
Although I do really love a good cookie, there's something about cookie dough that is SO much better. I love cookie dough! In my ice cream, in my cupcakes, and definitely in my fudge.
This tasty treat is suuuuper sweet and perfect in small quantities. It would pair wonderfully with a cup of coffee or a glass of milk. And a major plus is that there's no baking involved. It's just mixing stuff together and sticking it in the fridge!
Don't let the terrible photo fool you, this is a dessert that everybody will want to try!
What You'll Need:
cookie dough:
1/3 cup unsalted butter, softened
1/4 cup sugar
1/4 cup light brown sugar
1/2 tsp vanilla extract
1/8 tsp salt
2 tbsp heavy cream
1/2 cup flour
fudge:
1/3 cup light brown sugar
1/3 cup unsalted butter
pinch of salt
1/3 cup heavy cream
4 cups powdered sugar
1 tsp vanilla extract
1/2 cup chocolate chips
What To Do:
Line an 8x8 baking pan with aluminum foil and set aside.
To prepare cookie dough: combine butter and sugars in the bowl of a stand mixer. Beat on medium speed until it is light and fluffy. Mix in vanilla, salt, and cream. Add flour and mix until just combined, being careful not to overmix. Set aside.
To prepare fudge: in a medium saucepan, combine brown sugar, butter, salt and cream. Stir over medium heat until the butter is melted and the sugar is dissolved. Remove from heat and slowly stir in powdered sugar, a little at a time, until the mixture is smooth and well incorporated. Stir in vanilla. Add more powdered sugar as necessary for taste and texture (the more sugar, the sweeter and firmer the fudge will be).
Add cookie dough to the fudge base and stir to combine. Ensure that the mixture is at room temperature before stirring in the chocolate chips. Once combined, spread fudge into the prepared pan. Chill for four hours or until set. Cut into squares and enjoy with a glass of milk!
Recipe from Sally's Baking Addiction
Friday, September 20, 2013
Blackberry Yogurt Swirl Paletas
I know everyone is enjoying cool fall weather, but here it is still quite warm. The low was 73 today (and that was in the middle of the night) but I still wore a scarf and a cardigan to celebrate haha! I love autumn- crock pot meals, boots, football, pumpkin and salted caramel everywhere- it's a lot to love. But while it's still warm here, I'll be enjoying delicious frozen treats like these beautiful blackberry swirl paletas!
I made some full size pops and some tiny shot glass pops for quick snacking. I love the way the fruit complements the lemon-honey yogurt- a perfect combination of sweet, tart, creamy and cool.
- What You'll Need:
- 1/2 cup water
- 1/2 cup sugar
- 1 lemon
- 1 1/2 cups plain unsweetened Greek-style yogurt
- 2 tablespoons honey
- 2 cups fresh blackberries or other berries of your choice
- What To Do
- 1. Combine the water and sugar in a small saucepan. Cook over medium-high heat, stirring, just until the mixture comes to a boil and the sugar has dissolved.
- 2. Rinse the lemon and then slice off the zest, but not the underlying pith, in long strips. (Save the underlying lemon for a different use.) Add the strips of lemon zest to the pan, lower the heat to medium, and simmer for 5 minutes. Let the syrup cool to room temperature. Strain the syrup through a fine-mesh sieve, then refrigerate until chilled, at least 1 hour.
- 3. Add the yogurt and honey to the chilled syrup and stir until thoroughly combined. Place some of the sweetened yogurt mixture into each of the molds, filling to about halfway.
- 4. Place blackberries, a sprinkle of sugar and a couple of drops of water in a blender or food processor. Blend until a consistent textured liquid. Pour fruit into popsicle molds and swirl with a popsicle stick. Pour more yogurt mixture over to fill.
- 5. If using conventional molds, snap on the lid and freeze until solid, 3 to 4 hours. If using glasses or other unconventional molds, freeze until the pops are beginning to set (45 minutes to 1 hour), then insert the sticks and freeze until solid, 3 to 4 hours.
Recipe from Paletas by Fany Gerson
Tuesday, August 27, 2013
coffee and cream cupcakes
These tasty cakes were the last treats I made this summer for the students at OMBC. It had been an especially trying day, as I faced closed doors concerning housing, loans and moving logistics. I was frustrated and irritable and decided I needed to bake. I scoured my pinterest cupcake board for inspiration and decided on this fantastic recipe from Annie's Eats.
Meticulously measuring out the ingredients calmed my frenzied spirit. The sweet aroma of espresso powder and sugar dissolved my frustrated exterior into a vulnerable state. Now I don't know about y'all but God speaks to me through food. Alone in the kitchen, my guard down, God began to surround me with His presence.
If you've ever made a swiss meringue buttercream (which is what this recipe calls for), you know that even the tiniest can dissolve the beautiful, fluffy concoction into a soupy mess. I managed to whip the sugared egg whites into a perfect fluff, watched the butter thicken the concoction into a beautiful frosting. But then, for no apparent reason, the mixture broke down into a separated, ugly mess. The recipe assured me that if I kept mixing it, the frosting would come together.
And God whispered to me- it's not together quite yet. This frosting, your life. You can't see how things are going to work out but if you wait and have faith, they will.
Five minutes later, the frosting returned to its glorious state of light loveliness.
And you know what? Not everything in my life is answered for or makes sense right now. But all of the major things I was stressed over that night have been resolved! God is faithful.
Aside from the spiritual significance of these beauties, the flavor and texture are really divine. They have rich coffee flavor (I actually added more espresso powder than the recipe calls for). Buttery, light-as-air frosting balances the moist cake perfectly. One student even said these were the best cupcakes she's ever had!
What You'll Need:
(makes 18-22 cakes)
for the cakes:
3/4 cup (1.5 sticks)
unsalted butter, at room temperature
1 1/2 cups sugar
3 large eggs
2 cups all purpose
flour
1 tsp baking powder
1/4 tsp salt
1 tbsp espresso powder
1/2 cup strong brewed
coffee
1/4 cup + 2 tbsp
buttermilk
for the frosting:
3 large egg whites
1/2 cup sugar
1 vanilla bean, split
lengthwise
3/4 cups unsalted
butter, at room temperature
2 tsp espresso powder
2 tsp very hot
water
What To Do:
Preheat the oven to
350˚ F. Line cupcake pans with paper liners. In the bowl of an
electric mixer, combine the butter and sugar. Beat on medium-high speed
until light and fluffy, about 3 minutes. Blend in the eggs one at a time,
mixing well after each addition. In a small bowl, combine the flour,
baking powder, salt and espresso powder. Whisk to blend. In a
liquid measuring cup, combine the coffee, buttermilk, and coffee liqueur.
With the mixer on low speed, add in the dry ingredients alternating with
the liquids, mixing each addition just until incorporated and beginning and
ending with the dry ingredients.
Divide the batter
between the prepared cupcake liners, filling each about ¾ full. Bake
18-20 minutes or until a toothpick inserted in the center comes out clean.
Let cool in the pans 5-10 minutes, then transfer to a wire rack and let
cool completely.
To make the
frosting, combine the egg whites and the sugar in a heatproof bowl set
over a pot of simmering water. Scrape in the seeds from the vanilla bean
pods. Heat, whisking frequently, until the mixture reaches 160° F and the
sugar has dissolved. Transfer the mixture to the bowl of a stand mixer
fitted with the whisk attachment. Beat on medium-high speed until stiff
peaks form and the mixture has cooled to room temperature, about 8 minutes.
(The bowl should be cool to the touch.)
Reduce the speed to
medium and add the butter, 2 tablespoons at a time, adding more once each
addition has been incorporated. If the frosting looks soupy or curdled,
continue to beat on medium-high speed until thick and smooth again, about 3-5
minutes more. Remove about half of the frosting to a bowl and set aside.
In a small bowl, combine the espresso powder and hot water and whisk to
dissolve. Blend the espresso powder mixture into the frosting remaining
in the mixing bowl until smooth and completely incorporated, scraping down the
sides of the bowl as needed.
Fit a pastry bag with
a large tip. Fill one side of the pastry bag with the vanilla
frosting, and then fill in the other side with the coffee frosting. Pipe a test
streak until you see both colors coming out of the tip. Frost cupcakes as
desired, refilling the pastry bag in the same manner as needed.
Recipe from Annie’s Eats
Monday, August 26, 2013
Lime Pie Paletas
On our very first trip as student minister and youth group, we were canvasing flyers in an apartment complex. And every time we went, tinkling music played as an older man pushed a freezer cart full of frozen treats. The kids would get super excited, dig for their cash and run after him.
"Where are you going?" I asked one student. "The paleta man!" she replied.
Insert confused face here. "Huh?" I had no clue what they were talking about. Thankfully one of them took pity on me and explained that a paleta is basically a popsicle- a frozen treat on a stick. It was my first experience with paletas (which I also coughed up a dollar daily to enjoy) but definitely not my last! This past year I lived right by an elementary school and the paleta cart was there at the corner every day for the children (and neighbors) to enjoy.
I came across Paletas by Fany Gerson and some $1 popsicle molds at Walmart and it has been a beautiful combination. I bookmarked so many recipes to test! These lime pie pops got my immediate attention because I happened to have sweetened condensed milk in my pantry and limes are currently 10 cents each. They are fantastically creamy, tart and sweet! I love how the fresh squeezed juice really shines through. Plus, they're ridiculously easy to make. Juicing the limes is the hardest part.
This recipe makes 8 full size pops or 24 mini pops. The photo displays paletas molded in 1 oz measuring shot glasses. I think these are the perfect size for a party or just for casual snacking!
What You'll Need:
1 (14 oz) can sweetened condensed milk
1 cup half and half
3/4 cup fresh lime juice (about 4-5 small limes juiced)
1 tsp lime zest
pinch of salt
green food coloring (optional)
2 cups crushed Graham Crackers
What To Do:
Whisk together the milk, half and half, lime juice, zest and salt until completely uniformly mixed. Add food coloring if desired and stir well.
Pour into your molds. (If using shot glasses/Dixie Cups or other unconventional molds, freeze for 1 hour and then add popsicle sticks.) Freeze for 4-5 hours.
Run warm water around the molds before gently removing your paleta. Before serving, roll each paleta in cracker crumbs to complete the perfect pie combination!
Recipe adapted from Paletas
Wednesday, August 7, 2013
Soft Chocolate Chip Pecan Cookies
Fast forward to this summer when David mentions that his favorite cookies are anything with chocolate chip + nuts. So for the Tuesday night youth Bible study I decided to whip up a batch for everyone to enjoy (the recipe makes 6 dozen). It was one of those days when nothing seemed to be going right and I just needed to bake.
Y'all.
You don't even understand how good these cookies are. They stay soft for days! No hard cookies here. The chocolate chips stay melty and perfect and the pecans add just the right amount of nutty crunch!
I highly recommend these for the next time:
- you want to bake
- you have to make something for a bake sale
- you want to do something nice for someone else
- you are in charge of dessert for a party/get together
- you're hungry
Basically, make these cookies, ASAP.
What You'll Need:
(makes six dozen)
2 tsp baking soda
2 cups unsalted butter, softened
1 1/2 cups packed brown sugar
1/2 cup white sugar
2 (3.4oz) packs of instant vanilla pudding
4 eggs
2 tsp vanilla extract
4 cups chocolate chips (I use a mix of semi-sweet chocolate, dark chocolate and milk chocolate chips)
2 cups chopped pecans
What To Do:
Preheat oven to 350 degrees. Grease baking sheets and set aside.
In a medium mixing bowl, sift together the flour and baking soda. Set aside.
In a large mixing bowl, cream together the softened butter, brown sugar, and white sugar. Beat or whisk the instant vanilla pudding until mixed well. Whisk in the eggs and vanilla extract.
Add the flour mixture and stir together. Finally, add the chocolate chips and pecans/walnuts. Mix slowly.
Spoon out tablespoon sized portions and roll between hands to form balls (like a golf ball). Bake for 15 minutes at 350 degrees. Remove from oven and let sit 10 minutes before removing. Move to a wire rack to completely cool. Store in an airtight container.
Recipe from Kerrie Williams
Thursday, July 25, 2013
Simple S'mores Bar
One messy bite and I am taken back to roasting marshmallows, laughing, and telling stories on the chilly beach in Seaside, Oregon with my Go Now Missions team. Another bite and I remember the campfire in my grandma's backyard where all of my cousins and I gathered around with hot dogs and s'mores- seeing who could avoid setting their treat on fire. As I finish off my s'mores dessert I relive sleepovers with my best friends in high school, out in the country, dancing and laughing around the fire, hyped up on the sugary sweet dessert.
From toddlers to senior citizens, s'mores have a way of bringing people together and pulling the goodness of summer together in a bite size treat. But sometimes, it's impractical or impossible to initiate the s'mores magic with a campfire/bonfire. Sometimes, you gotta roast them in the fireplace, over the bbq pit or (gasp!) in the oven. We did just that with our youth group and added in some fun variations to keep things interesting. Here's what we did and some super simple ideas for you!
We had plain Graham crackers, Hershey's chocolate bars, and jumbo marshmallows with the following add-ons available:
- peanut butter
- Nutella
- honey
- bite size candy bars
- white chocolate chips
- cinnamon
- brown sugar
- cayenne pepper
- coconut
- instant coffee
I would also suggest:
- dark chocolate
- caramel sauce
- sliced strawberries
- sliced bananas
- bacon
- mint
- cream cheese spread
We allowed each student to build their s'more, placed them all on a baking sheet and baked at 400 for 10 minutes (or until marshmallows were toasted and chocolate was melted).
Alternatively, you can leave the top cracker to the side and use the broiler to toast the tops of the marshmallows in the oven, then place the crackers on top when cooked!
They turned out fabulously! No burnt mallows, served up in little bowls to steep the mess, a great indoor solution to a popular outdoor favorite!
What's your favorite s'mores memory? What's your favorite way to prepare them?
Thursday, July 11, 2013
Piña Colada Popsicles
I made these sweet and creamy dessert pops for youth group last week. They went super fast and unfortunately I didn't snap a picture. I used the leftover mixture to make a nice little virgin piña colada afternoon treat! However, even without the nicely staged and edited photos, I can vouch that these popsicles are quite delicious and very easy!
The recipe is ridiculously flexible- sub in coconut milk for cream of coconut, add mango or papaya, or garnish the pops with chunks of fruit. I have some cute popsicle molds that I found on sale at Wal-Mart for $1. However, if you don't have those, you can use ice trays (regular or water bottle style) with toothpicks or popsicle sticks. Another simple option is to use Dixie cups- 3oz disposable paper cups- with toothpicks, wooden ice cream spoons, or popsicle sticks.
What You'll Need:
1 banana
1 8 oz can crushed pineapple
1 10 oz can cream of coconut
juice of one large lime
1 tsp vanilla extract
What To Do:
Combine all of the ingredients in a blender and blend well. Pour into molds. Allow pops to set for 30 min- 1 hour before adding popsicle sticks. Freeze for at least two hours- and enjoy!
Recipe adapted from Loves Food and Art
Wednesday, June 26, 2013
Coffee Popsicles
These super simple popsicles are a great summer afternoon pick me up! I'm not a fan of artificial fruit flavoring so these provide an easy alternative. You can add and adjust the flavoring just like you would your own cup of coffee! I prepared my popsicles in an ice tray for ice that fits in bottled water. And if you decide that you don't want to worry about a dripping frozen treat, you can blend it up with milk for a frappe.
What You'll Need:
2 cups brewed coffee
1/2 cup half and half (more or less to taste)
1 tsp vanilla extract
2 tbsp sugar
2 tbsp caramel syrup
Popsicle mold
Popsicle sticks
What To Do:
Brew the coffee and combine all other ingredients- be sure all the sugar is dissolved. Divide among the Popsicle mold, add Popsicle sticks and freeze for at least 4 hours!
(The popsicle sticks will center more easily if you freeze the pops for about an hour before inserting them)
Easy peasy.
Tuesday, February 12, 2013
Strawberry Cream Crepes with Chocolate Drizzle
These are absolutely delectable and make a gorgeous presentation! The best part? They're easier to make than pancakes. No, really! These would make a perfect Valentine's night dessert for your little ones or your significant other... or for girls night! Because really, what's better than chocolate and strawberries with a light-as-the-clouds cream cheese filling? That's what I thought.
What You'll Need:
serves 2-3
for the crepes:
1/2 cup flour
3/4 cup whole milk
1 tbsp sugar
1/4 tsp salt
2 large eggs
1 1/2 tbsp unsalted butter, melted
for the filling:
1/2 lb strawberries
1 tbsp sugar
4 oz cream cheese
4 oz mascarpone cheese
1 cup powdered sugar
1 tsp vanilla extract
1/4 cup heavy whipping cream
for the drizzle:
1/2 cup chocolate chips
4 tbsp heavy whipping cream
What To Do:
To prepare the crepe batter, combine all of the ingredients in a blender and blend until completely smooth, about thirty seconds. Cover and refrigerate the batter for an hour.
Meanwhile, Rinse and chop the strawberries, storing in a bowl. Sprinkle with sugar and stir to fully incorporate. Cover the strawberries with a paper towel and allow to sit at room temperature until ready to use.
Heat a nonstick skillet to medium heat and spray with cooking spray. Pour batter into the skillet (will be runny) and swirl to ensure it's evenly distributed. Allow to cook through and then flip it over with a spatula. Remove and all to cool on a plate.
To prepare the cream filling, beat together cream cheese, mascarpone cheese, powdered sugar and vanilla on medium speed until fully combined and fluffy. While mixing, slowly add the heavy whipping cream. Continue to beat until you reach the desired fluffiness.
To prepare the chocolate drizzle, place chocolate chips and heavy cream together in a microwave safe bowl and microwave for 30 seconds and then in 10 second intervals until fully melted, stirring each time. Add more cream for a thinner consistency if desired and stir well.
In the middle of each crepe, spread a generous amount of cream filling. Layer strawberries on top of that, and roll together carefully with the seams down. Drizzle chocolate over each crepe and garnish with extra strawberries.
crepe recipe adapted from Martha Stewart
Labels:
chocolate,
crepe,
dessert,
holiday,
recipe,
strawberry,
Valentine's Day
Tuesday, February 5, 2013
Homemade Blueberry Sauce
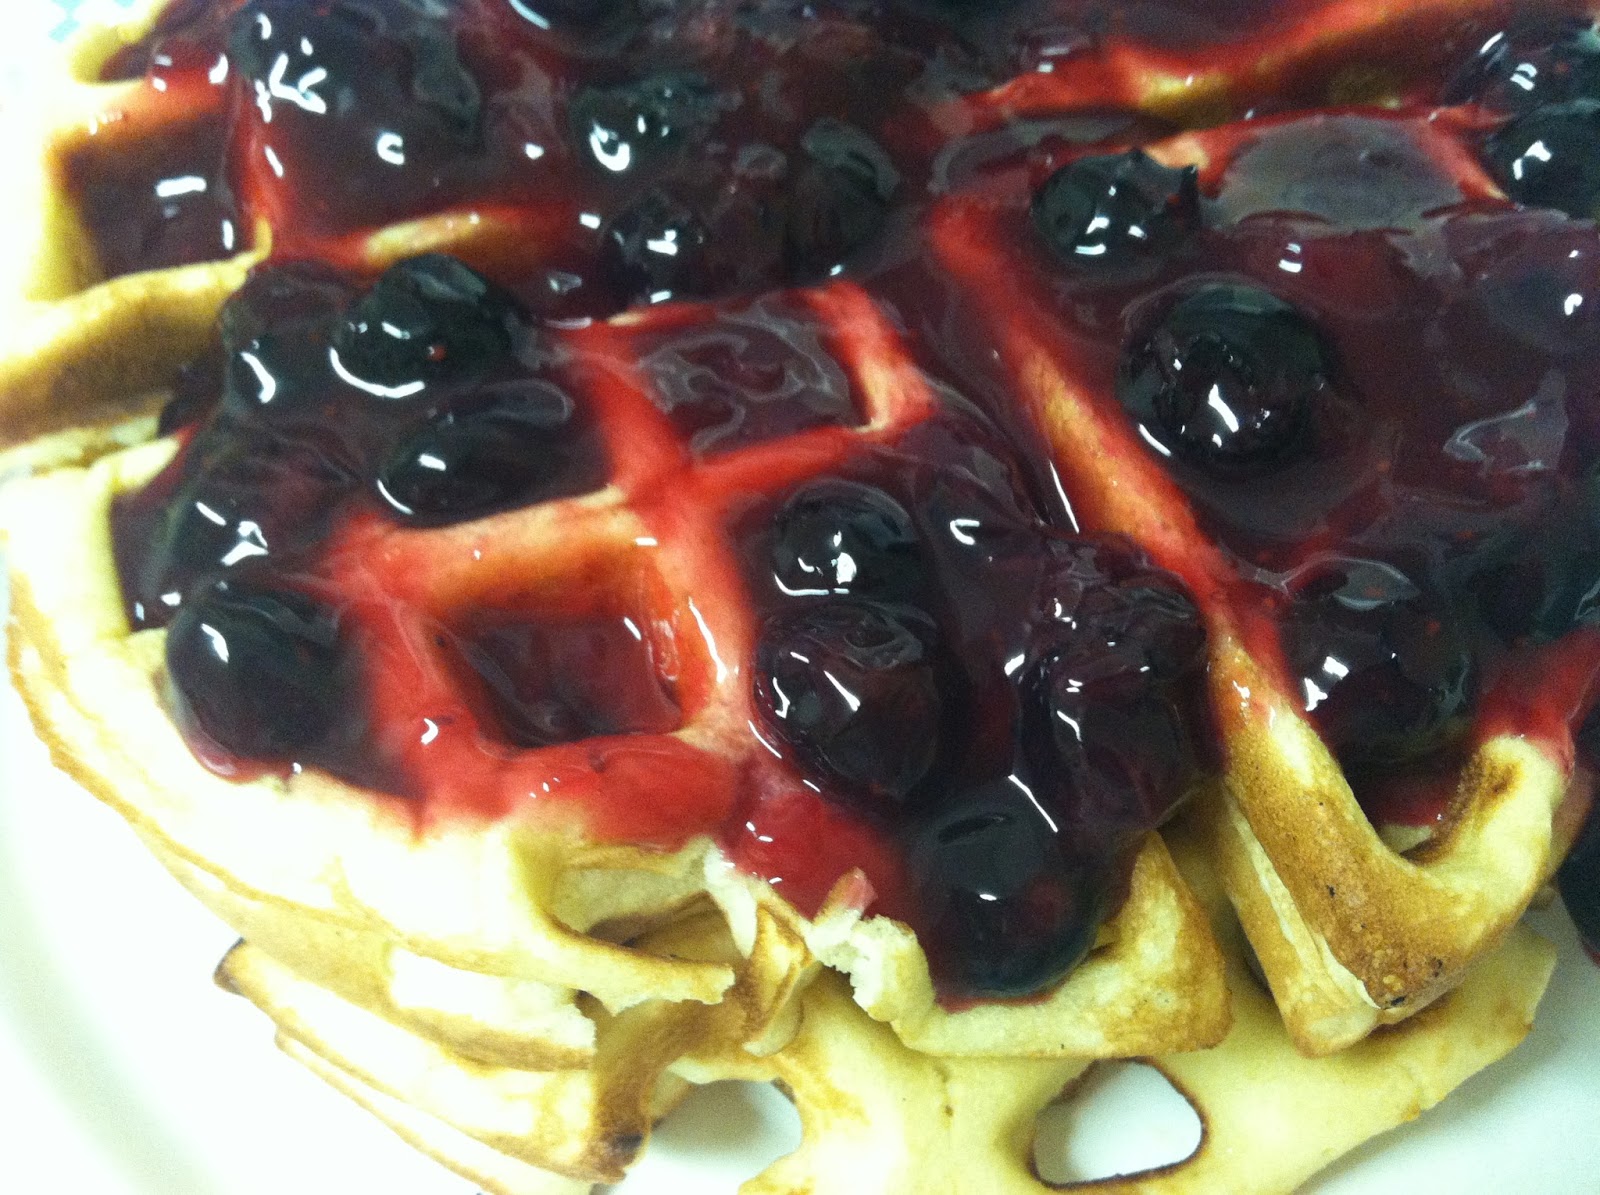
I love adding blueberries to my cereal, smoothies or yogurt, but sometimes I have a hard time finishing a carton by myself. With my last little bit I simmered them down into this delicious blueberry sauce- with no processed sugars! It would be perfect over waffles or pancakes (obviously), ice cream, or yogurt!
It is a perfect blend of sweet and tart and I didn't feel guilty at all smothering it all over these vanilla honey waffles. Plus it only takes about five minutes to prepare so would be great for mornings on a schedule.
What You'll Need:
1 cup fresh blueberries
1 cup 100% apple juice (I used Simply Apple)
2 tsp cornstarch, mixed with 2 tsp cold water
juice of 1/2 lemon
1/2 tsp vanilla extract
optional- 1 tbsp honey
What To Do:
Add blueberries, lemon juice and apple juice to a small pot and bring to a slow boil, stirring frequently. Combine the cornstarch and cold water and pour into the pot slowly, stirring carefully as to not crush the berries. Simmer about five minutes or until the sauce has thickened. Add vanilla. Check the consistency and sweetness of the sauce and adjust accordingly- adding honey for sweetness or more apple juice to thin out the sauce. Serve over waffles or your favorite treat!
inspired by My Baking Addiction
Monday, January 21, 2013
Chocolate Chip Cookie Dough Cupcakes
These cupcakes were incredible. Each bite tasted like a different component of chocolate chip cookie dough, of which I'm a huge fan. Be sure you have people to share these with when you make them because it is hard not to eat the whole pan!
What You'll Need:
For the cupcakes:
3 sticks unsalted butter, at room temperature
1½ cups light brown sugar, packed
4 large eggs
2 2/3 cups all-purpose flour
1 tsp. baking powder
1 tsp. baking soda
¼ tsp. salt
1 cup milk
2 tsp. vanilla extract
1 cup chocolate chips (semisweet or bittersweet)
3 sticks unsalted butter, at room temperature
1½ cups light brown sugar, packed
4 large eggs
2 2/3 cups all-purpose flour
1 tsp. baking powder
1 tsp. baking soda
¼ tsp. salt
1 cup milk
2 tsp. vanilla extract
1 cup chocolate chips (semisweet or bittersweet)
For the filling:
4 tbsp. unsalted butter, at room temperature
6 tbsp. light brown sugar, packed
1 cup plus 2 tbsp. all-purpose flour
7 oz. sweetened condensed milk
½ tsp. vanilla extract
¼ cup mini semisweet chocolate chips
4 tbsp. unsalted butter, at room temperature
6 tbsp. light brown sugar, packed
1 cup plus 2 tbsp. all-purpose flour
7 oz. sweetened condensed milk
½ tsp. vanilla extract
¼ cup mini semisweet chocolate chips
For the frosting:
2 sticks unsalted butter, at room temperature
½ cup light brown sugar, packed
2 1/3 cups confectioners’ sugar
2/3 cup all-purpose flour
½ tsp. salt
2 tbsp. milk
2 tsp. vanilla extract
2 sticks unsalted butter, at room temperature
½ cup light brown sugar, packed
2 1/3 cups confectioners’ sugar
2/3 cup all-purpose flour
½ tsp. salt
2 tbsp. milk
2 tsp. vanilla extract
For garnish:
Tiny chocolate chip cookies
Mini chocolate chips
Tiny chocolate chip cookies
Mini chocolate chips
What To Do:
1. To make the cupcakes, preheat
the oven to 350° F. Line two cupcake pans with paper liners (24 total). In the
bowl of a stand mixer fitted with the paddle attachment, combine the butter and
brown sugar. Beat together on medium-high speed until light and fluffy, about 3
minutes. Mix in the eggs one at a time, beating well after each addition and
scraping down the sides of the bowl as needed.
2. Combine the flour, baking
powder, baking soda, and salt in a medium bowl. Stir together to blend. Add the
dry ingredients to the mixer bowl on low speed, alternating with the milk,
beginning and ending with the dry ingredients, mixing each addition just until
incorporated. Blend in the vanilla. Fold in the chocolate chips with a spatula.
3. Divide the batter evenly
between the prepared cupcake liners. Bake for 18-20 minutes, until a toothpick
inserted in the center comes out clean. Allow to cool in the pan 5-10 minutes,
then transfer to a wire rack to cool completely.
5. To fill the cupcakes, cut a
cone-shaped portion out of the center of each cupcake. Fill each hole with a
chunk of the chilled cookie dough mixture.
6. To make the frosting, beat
together the butter and brown sugar in the bowl of a stand mixer fitted with
the paddle attachment until creamy. Mix in the confectioners’ sugar until
smooth. Beat in the flour and salt. Mix in the milk and vanilla extract until
smooth and well blended.
7. Frost the filled cupcakes as
desired, sprinkling with mini chocolate chips and topping with mini chocolate
chip cookies for decoration.
Recipe from Annie's Eats
Monday, January 14, 2013
Chocolate Bowls
Did I mention that I only took pictures with my phone over the holidays? Well, anyway, these chocolate bowls were a huge hit with family and made for a stunning presentation. Plus they were super fun to make (or for me to watch my sister make tee hee) and would be perfect for a sleepover!
I am not totally sure where specifically Lindsey found her inspiration. She didn't follow any directions- she just kinda went with it!
What You'll Need:
ballons
baker's chocolate
a steady cup
scotch tape
a pin
kitchen lighter
What To Do:
- Determine what size you want your bowls to be and inflate the balloon to that size. Lindsey made giant bowls which held two dozen cookies, but water balloons would be appropriate for smaller sizes.
- Place the balloon(s) into the cup(s), tail down.
- Melt baker's chocolate according to the instructions. (I think it would be really cool to use all white chocolate and swirl in a couple of drops of food coloring.) Allow chocolate to cool but not harden.
- Slowly drizzle chocolate over your balloon. Be sure to cover any gaps and create aesthetically pleasing designs. Lindsey created a base of milk chocolate and then added white chocolate embellishments. She also created a claw-like design. Be creative and design something you like!
- Allow chocolate to completely dry (at least one hour).
- Once chocolate is hardened, carefully remove balloon from cup. Place a small piece of scotch tape near the tail. Poke the pin through the tape to keep the balloon from popping suddenly.
- When balloon is deflated, remove it from the bowl. Repair any cracks or broken pieces by carefully melting it back together with a kitchen lighter.
- Keep bowls at room temperature and store airtight.
I would love to use these for ice cream or fruit! And then you could eat the bowl- win win!
Monday, December 31, 2012
Cast Iron Skillet Cinnamon Rolls (without yeast)
My mom and I had big plans for Christmas cinnamon rolls. We've always just kinda used the Pillsbury canned kind and this was the first year we were going to make them from scratch. I suggested the Pioneer Woman's version but then we decided on a recipe that just made one batch. Well, Christmas Eve came and we discovered that despite multiple trips to the grocery store in the preceding days, there was no yeast in the house. So, after some quick research we found this recipe which does not require any yeast! That means there's no crazy steps of letting the dough rise and then kneading and then waiting for it to rise again. Which was just fine with us :)
Now these were a little less fluffy than your typical cinnamon rolls, but were still soft, bathed in ooey-gooey cinnamon sugary butter, and reheated really well. Plus the icing is basically a cream cheese frosting... which I love. Oh, and better than the canned, processed kind if you have a few minutes to put them together.
What You'll Need:
for the rolls:
2 1/2 cups all purpose flour, plus extra for the counter
2 Tablespoons white granulated sugar
1 1/4 teaspoons baking powder
1/2 teaspoon baking soda
1/2 teaspoon salt
1 1/4 cups buttermilk
6 Tablespoons unsalted butter, melted
2 Tablespoons white granulated sugar
1 1/4 teaspoons baking powder
1/2 teaspoon baking soda
1/2 teaspoon salt
1 1/4 cups buttermilk
6 Tablespoons unsalted butter, melted
for the filling:
3/4 cup packed dark brown sugar
1/4 cup white granulated sugar
3 teaspoons cinnamon
1/8 teaspoon salt
1 Tablespoon unsalted butter, melted
1/4 cup white granulated sugar
3 teaspoons cinnamon
1/8 teaspoon salt
1 Tablespoon unsalted butter, melted
for the frosting:
4 oz cream cheese, softened
4 tbsp butter, softened
1/2 teaspoon vanilla
1.5 cups confectioner's sugar
1 Tablespoon milk
4 tbsp butter, softened
1/2 teaspoon vanilla
1.5 cups confectioner's sugar
1 Tablespoon milk
What To Do:
1. Preheat the oven to 425 degrees F. Generously coat your cast iron skillet with vegetable oil spray. You could also use a 9" round cake pan.
2. First make the filling. Combine together the brown sugar, 1/4 cup granulated white sugar, cinnamon, salt, and the 1 Tablespoon melted butter until the mixture resembles wet sand.
3. Then, make the dough: In a large bowl, whisk together the flour; 2 Tablespoons white granulated sugar, baking powder, baking soda, and salt.
4. In a separate bowl, whisk the buttermilk and 2 Tablespoons of the melted butter together.
5. Stir the buttermilk mixture into the flour mixture with a wooden spoon until absorbed, about 30 seconds.
6. Turn the dough out onto a generously floured counter and knead until smooth, about 1 minute.
7. Press the dough out into a 9 by 12 inch rectangle using your hands or a rolling pin.
8. Brush the dough with 2 Tablespoons melted butter. Sprinkle the dough evenly with the filling, leaving a 1/2-inch border. Press the filling firmly into the dough.
9. Loosen the dough from the counter using a bench scraper or a metal spatula.
10. Starting at a long side, roll the dough, pressing lightly, to form a tight log.
11. Pinch the seam to seal. Slice the dough into 8 even pieces. (The more even each roll, the more evenly they will cook!)
12. Place the slices in the greased skillet.
13. Brush with the remaining 2 Tablespoons melted butter. Bake until the edges are golden brown, 20-25 minutes.
14. Meanwhile, in a stand mixer combine all of the ingredients for the cream cheese icing until fully combined and smooth.
14. Let cool for 10 minutes before frosting with cream cheese icing. Serve warm!
recipe adapted from Moms Who Think
and because I'm a little weird, this is a little video I took as I oohed and aaahhhed over the yummy smell and bubbling deliciousness
I know that Christmas is over, but this is the perfect breakfast treat for any cold Saturday morning. You have to leave a little wiggle room in your New Years Resolutions, and there's a lot of winter left :) These completely fill your home with a delicious cinnamon sugar fragrance and warm happiness. I'm not even kidding. These fill your home with happiness.
Subscribe to:
Posts (Atom)