Showing posts with label healthy. Show all posts

Friday, September 20, 2013

Blackberry Yogurt Swirl Paletas

   
    I know everyone is enjoying cool fall weather, but here it is still quite warm. The low was 73 today (and that was in the middle of the night) but I still wore a scarf and a cardigan to celebrate haha! I love autumn- crock pot meals, boots, football, pumpkin and salted caramel everywhere- it's a lot to love. But while it's still warm here, I'll be enjoying delicious frozen treats like these beautiful blackberry swirl paletas! 

    I made some full size pops and some tiny shot glass pops for quick snacking. I love the way the fruit complements the lemon-honey yogurt- a perfect combination of sweet, tart, creamy and cool. 

  • What You'll Need:
  • 1/2 cup water
  • 1/2 cup sugar

  • 1 lemon
  • 1 1/2 cups plain unsweetened Greek-style yogurt

  • 2 tablespoons honey
  • 2 cups fresh blackberries or other berries of your choice

  • What To Do 
  • 1. Combine the water and sugar in a small saucepan. Cook over medium-high heat, stirring, just until the mixture comes to a boil and the sugar has dissolved.

  • 2. Rinse the lemon and then slice off the zest, but not the underlying pith, in long strips. (Save the underlying lemon for a different use.) Add the strips of lemon zest to the pan, lower the heat to medium, and simmer for 5 minutes. Let the syrup cool to room temperature. Strain the syrup through a fine-mesh sieve, then refrigerate until chilled, at least 1 hour.

  • 3. Add the yogurt and honey to the chilled syrup and stir until thoroughly combined. Place some of the sweetened yogurt mixture into each of the molds, filling to about halfway.

  • 4. Place blackberries, a sprinkle of sugar and a couple of drops of water in a blender or food processor. Blend until a consistent textured liquid. Pour fruit into popsicle molds and swirl with a popsicle stick. Pour more yogurt mixture over to fill. 

  • 5. If using conventional molds, snap on the lid and freeze until solid, 3 to 4 hours. If using glasses or other unconventional molds, freeze until the pops are beginning to set (45 minutes to 1 hour), then insert the sticks and freeze until solid, 3 to 4 hours.

Recipe from Paletas by Fany Gerson 

Monday, August 5, 2013

Summer Vegetable Saute


There are so many good things about summer. One of my favorites is the huge selection of fresh, delicious produce. I love being able to just wash produce and enjoy it raw, with all its nutrients, but cooking truly brings depth of flavor especially when you combine so many complementary tastes. 

This saute was packed with fresh summer flavors and can be adjusted to include all of your favorites! Heating tomatoes brings out their delicious natural sweetness, which pairs beautifully with sweet yellow onion and fresh corn. Savory notes from the garlic and zucchini balance the dish. A little kick of crushed red pepper rounds out the flavors nicely. I added a little protein with some diced summer sausage and topped everything off with a sprinkle of creamy feta cheese. 

And with only about 20 minutes from prep to serving, this dish is great for those in a hurry or for anyone wanting to avoid turning on the stove for too long! 

What You'll Need:
(serves 2)
2 tbsp olive oil or butter, divided 
1/2 yellow onion, diced
1 clove garlic, minced
1 ear of corn
1 zucchini, thinly sliced
1 cup grape tomatoes
1 cup diced summer sausage
sprinkle of feta cheese
1 tbsp crushed red pepper flakes
salt and pepper to taste 

What To Do:
Heat a saucepan over medium heat. Add oil, onion, and corn, stirring frequently until corn is slightly charred and onions are translucent. Add garlic and continue cooking for one minute. 

Add zucchini, tomatoes, and summer sausage. Season to taste with salt and pepper and add crushed red pepper. Add more oil as needed to keep saute from burning. 

Continue cooking, stirring often, for about ten minutes or until tomatoes are slightly charred and zucchini is tender crisp. Sprinkle with feta and serve immediately.

Serve in a bowl as a standalone meal, plate over brown rice/quinoa, wrap it up in whole wheat pita bread or layer over your favorite greens with dressing. This versatile dish can take so many forms!


Friday, July 26, 2013

Watermelon Limeade


This has been a summer of fun, fresh, fruit flavors- including strawberry pineapple lemonade (pureed strawberry, canned pineapple and lemonade powder), sparkling strawberry limeade, mango ague fresca, and now- watermelon limeade.

If you think biting into a juicy slice of watermelon is refreshing, wait until you take a sip of this balanced, sweet and tart, fresh fruit juice! The notes of watermelon leave a stunning pink color and a distinct taste- with almost the same hint as cucumber- light, lovely and summery. The limes add complementary tartness, coupled with simple syrup (or agave/honey/etc), to make this drink well-rounded. 

There is plenty of room to adjust according to taste with the recipe. In fact, I did not follow a recipe when I prepared the giant batch for our group- I just adjusted by taste. I am including estimations of how much you'll need, but adjust for your liking!

What You'll Need:
1 cup diced watermelon
2 cups cold water
2 limes
1/4 cup simple syrup*

What to Do:
In a blender, combine watermelon and water until homogeneous. Strain liquid through a fine mesh strainer to catch any seeds and pulp. Squeeze limes directly into watermelon mixture, add simple syrup, stir and pour over ice! 

*To make simple syrup, simmer one cup water with one cup sugar, stirring frequently, until the sugar is completely dissolved. Allow the syrup to cool and then measure and add to your drink!

___

After posting on Instagram, my friend Jackie posted a photo of her girls making the watermelon limeade and I was so tickled! If you ever try a recipe I have posted, please let me know! I love seeing how they turn out in other people's kitchens :)


Monday, May 13, 2013

Quick Mashed Sweet Potatoes


We've discussed before how nutritionally dense the sweet potato is- which is perfect because it is also super tasty and simple to prepare in so many different ways! I love it in this breakfast quinoa hash or stuffed with black beans and corn, but simple mashed sweet potatoes are just as good. You can always cube and boil the potatoes like you would make regular mashed potatoes. But if you need dinner on the table ten minutes ago, this is the way to go. 

What You'll Need:
1 sweet potato
2 tbsp butter
1 tsp salt
dash of cinnamon

What to Do:
Slice potato in half and poke holes all over it. On a microwave safe plate, microwave on high for five minutes. Check the potato to see if it's soft. (Mine was) Continue cooking in 20 second intervals until you reach the desired consistency. Scoop all the potato into a bowl and mash with a fork with butter, salt, and cinnamon. Serve warm.

Monday, May 6, 2013

Shrimp Pasta with Tomatoes, Spinach and Feta


After scoring some yummy shrimp on sale at the grocery store, I've been experimenting with how best to integrate them into meals. This simple pasta is packed with flavor and only took about ten minutes to prepare, including preparing the pasta. It's perfect for a light summer dinner and definite proof that you don't need to douse your pasta in a heavy, fatty sauce! 

What You'll Need:
(serves 3-4)
1 lb pasta (I used thin spaghetti but angel hair pasta would be divine!)
1 lb shrimp, peeled and deveined 
1 large tomato, diced
2 cloves garlic, minced
2 cups spinach
1/2 cup feta cheese 
juice of 1/2 lemon 
1 tbsp olive oil
salt and pepper 
dash of crushed red pepper

What To Do:
Prepare pasta according to package. 

Meanwhile, heat saucepan to medium heat. Add olive oil, garlic, tomatoes and spinach. Cook for about two minutes, making sure the spinach is completely wilted. 

Add shrimp in one layer, cooking 1-2 minutes per side or until opaque and white. Season with salt, pepper and red pepper. Squeeze lemon over the shrimp and stir to combine all the flavors. 

Drain pasta, reserving 1/2-1 cup pasta water. Pour pasta directly into pan with shrimp and stir to combine. Drizzle in pasta water to coat the noodles as desired. Add feta cheese. Stir and serve!

original recipe

Tuesday, April 23, 2013

Infused Water


As warmer weather approaches, I am reminded of the necessity of staying hydrated. [Okay actually I tried to sell plasma to raise money for a friend's mission trip and they told me I was too dehydrated to donate. Lame.]  And I don't actually like water. I would much rather have Dr. Pepper or iced coffee... or lemonade... or really anything with some flavor! In an effort to satisfy by taste buds and my hydration needs, several infused water flavors were tested.

So here are some simple and delicious ways that I spiced up my water- by infusing them with fruits, vegetables and herbs! I stored the water in Mason jars, mostly because they're airtight and I don't have any pitchers with lids. I removed the lime slices after 3-4 hours because the rind started to leave a funny taste in the water. 

Pineapple-Blueberry Infused Water. This flavor was really delicious! The blueberries tinted the water a pretty pink hue and the pineapple left sweet notes in every sip. 

Cucumber Lime, Blueberry Lime, and a mess of Cucumber, Lime, Jalapeno and Cilantro.

The Cucumber Lime water was crisp and refreshing! I really liked it. 

The blueberry lime was very pretty and pretty tasty as well- be sure to muddle the blueberries for more of their flavor! 

The spicy water was super spicy. If I do it again I will definitely cut down on the amount of jalapeno I use and how long I let it soak. 

I have gotten some great suggestions for other combinations to try such as strawberry basil, watermelon mint and raspberry lime. What is your favorite flavor of infused water?

Wednesday, April 17, 2013

Southwestern Stuffed Sweet Potatoes


This was so good- chock full of nutrients and bursting with flavor
Plus, with prep and cooking it still comes together in less than ten minutes
This dish is gluten-free, vegetarian and could easily be vegan/dairy-free with a sour cream substitute like silken tofu. 

This recipe is for one portion- I whipped it up for lunch- but it could be very easily multiplied to make an entire family portion!

Another tip to help this dish come together quickly is to bake the potatoes the night before and refrigerate until ready to eat- then just reheat in the microwave!

What You'll Need:
(serves 1)
1/2 medium sweet potato
1 tbsp sour cream
1 tbsp chopped jalapeno
3 tbsp sweet corn
3 tbsp black beans 
1 tbsp chopped red onion
seasonings to taste
salt
black pepper
chili powder
garlic powder 
optional for topping
sliced avocado
shredded cheese

What To Do:
With a fork, poke holes in the halved potato, aerating it evenly. Microwave for five minutes. While the potato cooks, chop your onion, jalapeno, and avocado. Rinse the corn and black beans.

When cooking is complete, remove potato from microwave and scoop most of the insides into a bowl. Mix the sour cream and seasoning into the potato. Mix in jalapeno, onion, beans and corn. Scoop the mixture back into the potato skin and top with sliced avocado. 

Yum!

Monday, April 8, 2013

Honey Lime Tilapia


My freezer is always stocked with ground beef, boneless skinless chicken breasts and tilapia fillets- versatile basics that can inspire any number of dinners. When I saw this tilapia recipe, I knew that it would be perfect for a light, healthy dinner! The marinade soaks in a fantastic honey-lime flavor. The light breading gives the fish a delicious crispy coating (without frying!). And this entree could easily be served alongside whatever vegetables you have on hand. I served mine with roasted sweet potatoes, spicy brown rice and stuffed jalapenos. It would be lovely wish roasted Brussels Sprouts, broccoli, asparagus, kale, green beans, etc etc. 

I'll definitely be making this again! 

What You'll Need
4 tilapia fillets (about 4-5 ounces each)
2 tablespoons lime juice (from 1 large lime)
Zest of 1 lime
1 tablespoon olive oil
1 1/2 tablespoons honey
1/2 teaspoon salt
1/2 teaspoon black pepper
1 clove garlic, finely minced
1/4 teaspoon salt
1/2 cup all-purpose or whole wheat flour
1/4 teaspoon black pepper
1-2 tablespoons olive oil

What To Do:

In a small bowl, whisk together the lime juice, lime zest, olive oil, honey, salt, pepper and garlic. Place the tilapia in a gallon-sized ziploc bag and pour the marinade on top of the fish. Press the air out of the bag and seal. Refrigerate the fish for at least an hour and up to 4 hours. It helps to lay the bag in a flat dish and turn it over once or twice during the marinading time since the marinade won't completely cover the fish.

Before cooking, whisk together the flour, salt and pepper in a shallow dish like a pie plate. Heat the olive oil in a large nonstick skillet over medium heat until rippling and hot. Dredge each tilapia fillet in the flour, coating both sides lightly. Cook the fillets for 3-5 minutes per side without moving the fish while it cooks on each side; this will ensure a more even browning. Adjust the cooking time as needed depending on the thickness of the tilapia and the heat of the skillet and work in batches if necessary so the skillet isn't overcrowded.

Serve hot with lime wedges and side dishes!


Recipe from Mel's Kitchen Cafe, adapted slightly from One Lovely Life

Thursday, April 4, 2013

Spicy Baked Sweet Potato Fries


Here are some fun facts about sweet potatoes. They are fat free, cholesterol free and have a low glycemic index. They are an excellent source of beta carotene, potassium, iron, Vitamin E, Vitamin C, and Vitamin B-6. The Center for Science in the Public Interest rates sweet potatoes as the number one most nutritious vegetable! (source and source). 

Oh and one medium sweet potato is only about 100 calories. 

So, really, you can feel great about eating these fries ;)  With just a touch of olive oil and a tasty blend of spices, these baked fries make the perfect snack or side dish. I made a half serving portion for myself and will definitely be making more. Very soon. Like maybe tonight. 

These go great with avocado cream sauce


What You'll Need:

makes 4 servings
  • 4-5 sweet potatoes (about 1 1/2 lb.), unpeeled, each cut lengthwise into 8 wedges
  • 1/4 cup olive oil
  • 1/2 teaspoon smoked paprika
  • 1/4 teaspoon garlic powder
  • 1/8-1/4 teaspoon cayenne pepper
  • Kosher salt, freshly ground pepper

What To Do:
Preheat oven to 450°. Toss potato wedges, oil, paprika, garlic powder, and cayenne pepper on a foil-lined large rimmed baking sheet to evenly coat; season potatoes with salt and pepper.

Roast, turning once, until wedges are golden brown and crisp, 25-30 minutes.


Recipe from Shutterbean, originally adapted from Bon Appetit 

Wednesday, March 27, 2013

Baked Coconut Tilapia with Strawberry Avocado Salsa


So, Shawnda posted this recipe and I was greatly intrigued by this strawberry-avocado marriage. After all, those are two of my very favorite things and two sure signs of warm weather and happy days. 
But (and hopefully this will change at some point), I'm not a huge fan of salmon. Then I remembered that I had this recipe bookmarked from Jessica. I ended up adjusting that a little as well and the end result was light, summery, and delicious- a blend of sweet, spicy and savory. 


What You'll Need:
for the salsa:
1/2 pint of strawberries, hulled and diced
1 large avocado, diced
1/4 cup finely diced red onion
1 jalapeno, seeded and diced
Small handful of cilantro, chopped
Juice of 1/2 orange
Juice of 1/2 lemon
Pinch of salt
for the fish:
4 tilapia filets  
2 egg whites
2 tbsp cornstarch
2 cups sweetened flaked coconut

What To Do:
Combine all of the salsa ingredients in a bowl, cover, and refrigerate. 

Preheat the oven to 400 degrees. In a small small, beat egg whites with a hand mixer until soft peaks form. Place cornstarch and coconut on two separate plates. 

Dip the fish lightly in the cornstarch, then the egg whites, then finally in the coconut coating, being sure to coat them well. Place coated fish on cookie sheet and bake for 15-17 minutes or until coconut is golden brown. Flip over halfway through to ensure even browning.

Serve hot, covered in salsa! 


Friday, February 8, 2013

Creamy Chipotle Carrot Soup with Goat Cheese


It really is that bright orange. 

It is probably just me, but even though I love to snack on baby carrots, I tend to have a nearly full bag of drying-out carrots before too long. Well, as to not let these dear orange friends go to waste, I whipped up some carrot soup! I'd never had it before, but it turned out quite delicious and very similar to my butternut squash and pumpkin soup. I read a few different recipes and then just kinda winged it. It was a tiny bit bland for my taste so I kicked it up with chipotle seasoning and goat cheese. Perfection. 

I ate two glorious bowls and thought- this is basically just carrots so it's totally okay to have seconds!

It's naturally gluten free, and can easily be made vegan or dairy free with a couple of substitutions. Sub in vegetable broth for the chicken broth, olive oil for the butter, and coconut or almond milk for the half and half. I really love how versatile it is!

What You'll Need:
1 lb bag of baby carrots, chopped (or one pound carrots, peeled and diced)
1 tbsp butter
1/2 yellow onion, diced
2 cloves garlic, minced
2 cups chicken broth 
1/2 cup half and half
1 cube chipotle seasoning or 1 chipotle in adobo sauce, pureed
salt and pepper to taste
goat cheese crumbles 

What To Do:
Heat butter over medium heat and cook onions for 5 minutes or until translucent but not browned. Add garlic and cook until fragrant, about one minute. Add carrots, broth, salt and pepper. Bring pot to a boil, then reduce heat to medium and simmer for about twenty minutes or until carrots are very soft. Transfer contents into a blender and blend until completely smooth, doing so in batches if necessary. Pour back into pot and add half and half and chipotle. Stir together and adjust salt and pepper to taste. Serve warm, topped with goat cheese crumbles. 

Delicious and healthy!

Tuesday, February 5, 2013

Homemade Blueberry Sauce


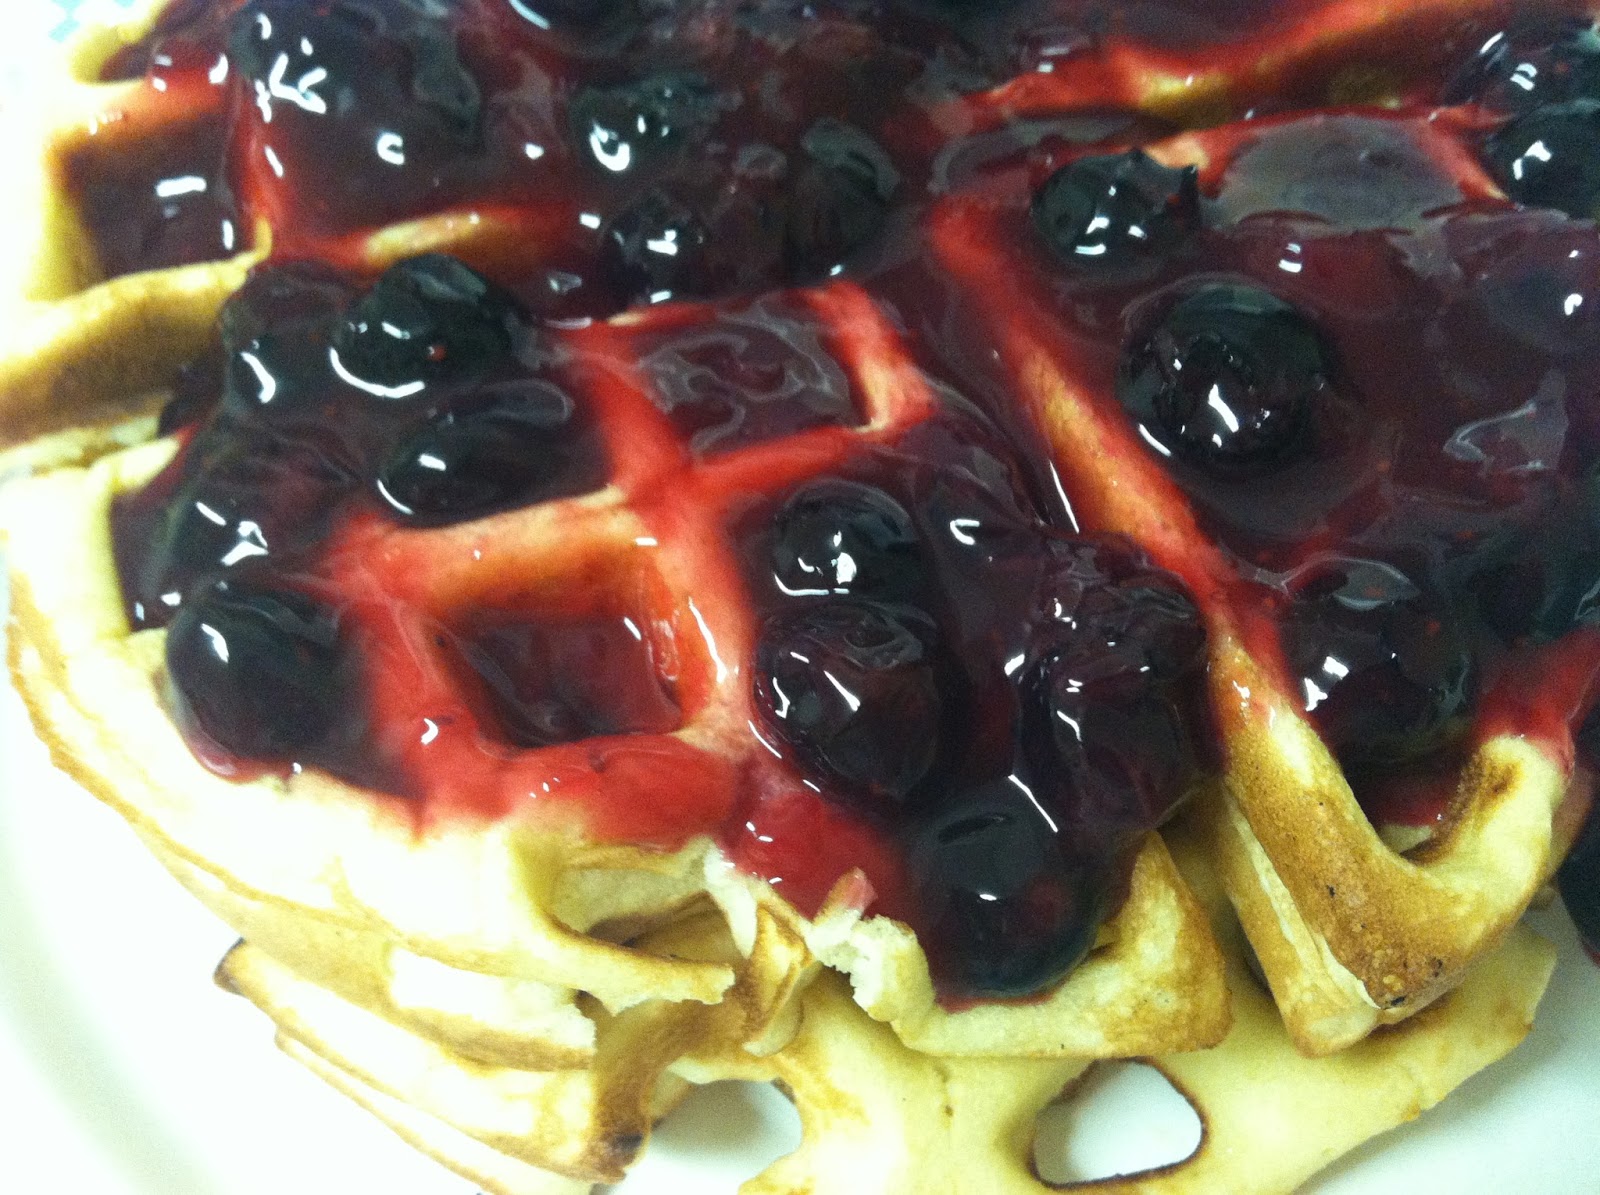
I love adding blueberries to my cereal, smoothies or yogurt, but sometimes I have a hard time finishing a carton by myself. With my last little bit I simmered them down into this delicious blueberry sauce- with no processed sugars! It would be perfect over waffles or pancakes (obviously), ice cream, or yogurt! 


It is a perfect blend of sweet and tart and I didn't feel guilty at all smothering it all over these vanilla honey waffles. Plus it only takes about five minutes to prepare so would be great for mornings on a schedule.


What You'll Need:
1 cup fresh blueberries
1 cup 100% apple juice (I used Simply Apple)
2 tsp cornstarch, mixed with 2 tsp cold water
juice of 1/2 lemon
1/2 tsp vanilla extract
optional- 1 tbsp honey

What To Do:
Add blueberries, lemon juice and apple juice to a small pot and bring to a slow boil, stirring frequently. Combine the cornstarch and cold water and pour into the pot slowly, stirring carefully as to not crush the berries. Simmer about five minutes or until the sauce has thickened. Add vanilla. Check the consistency and sweetness of the sauce and adjust accordingly- adding honey for sweetness or more apple juice to thin out the sauce. Serve over waffles or your favorite treat! 


inspired by My Baking Addiction

Thursday, January 17, 2013

Healthy Recipes

I am very aware that my recipe posts since the new year have been fatty, sugary and fried while many people are embarking on new journeys embracing healthy living and wise diet choices. So here are some previously posted healthy(er) recipes with some tips on how to make them even healthier!

Breakfast/Snack

Fruit and Yogurt Parfaits


Homemade Granola


Roasted Peaches with Greek Yogurt and Honey


Breakfast Banana Splits 
use melted jam or honey for a drizzled topping instead of Nutella 

Grab and Go Breakfast Bars


Green Monster Smoothie


Lunch/Dinner
sides:
Creamy Butternut Squash and Pumpkin Soup 
substitute skim milk for heavy cream 

Roasted Fresh Green Beans and Grape Tomatoes 


salads:
Harvest Apple Salad
add grilled chicken breast for a complete meal, omit croutons 

Summer Tuna Salad
omit the dressing- it doesn't need it!

Southwest Quinoa Salad


seafood:
Super Simple Baked Tilapia


Grilled Fish Tacos with Mango Cucumber Salsa 
use corn tortillas, omit chipotle crema 


Baked Coconut Shrimp with Sweet and Spicy Dipping Sauce
use organic or sugar free jam for the dipping sauce


entrees:
Sweet Potato Quinoa Skillet
substitute turkey bacon or omit bacon completely, poach egg instead of frying it!


Balsamic Honey Chicken with Apples


Chicken with Tomato Herb Pan Sauce
sub in your favorite better substitute- olive oil, coconut oil, etc and serve with brown rice, mixed greens or quinoa 

Tuesday, November 13, 2012

Creamy Butternut Squash and Pumpkin Soup


What You'll Need:
1 butternut squash
1/2 can pumpkin puree
32 oz vegetable broth
(spices to taste)
salt
black pepper
nutmeg 
cayenne 
1/2 cup heavy cream 

What To Do:
Peel and cube the squash. Heat vegetable broth over medium-high heat and add squash and spices. Simmer for thirty minutes or until squash is soft. Pour soup into a blender and blend until smooth. Pour back into your soup pot and add pumpkin puree and heavy cream, stirring well. Simmer for an additional five minutes and serve hot! 

I served the soup in small glass tumblers so that it could be enjoyed utensil-less! It would also look great is parfait or shot glasses.  Of course, plain ol' bowls with spoons work too :) 

Garnish with a little more cream drizzled over the top or sprinkle Gorgonzola cheese and toasted pumpkin seeds over.

This recipe makes quite a bit of soup, but it freezes really well! It also lends itself to adaption very easily. You can omit the cream for a very healthy meal. You can add sweeter hints with maple syrup or molasses. You can add more savory hints with leeks, garlic or onion. Or kick it up with more cinnamon, cayenne or chipotles. The sky is the limit with this basic and very delicious recipe. 

Inspired by and adapted from  these three posts


Thanksgiving Cocktail Party Menu
Appetizer- Creamy Butternut Squash and Pumpkin Soup 


Tuesday, September 18, 2012

Sweet Potato Quinoa Skillet


For someone who loves a good steak, I sure have been lovin me some meatless meals. 

This meal does include bacon crumbles as well as vegetables cooked in bacon drippings, but it's the quinoa, egg, and black beans that provide the protein! This flavor combination is fantastic. It's warming without being too heavy, healthy-ish without being pretentious, and perfect for fall. 

I subbed a couple of things from the recipe at Jessica's blog and either way, this is definitely a winner. It can be eaten as breakfast, lunch or dinner, and is sure to please even your picky eaters. Hope you enjoy!


What You'll Need:
serves 2
  • 2 slices thick-cut bacon, chopped 
  • 1 small sweet potato, chopped 
  • 1/2 onion, chopped 
  • 1/2 jalapeno pepper, chopped 
  • 2 garlic cloves, minced 
  • 1/2 cup uncooked quinoa, rinsed
  • 1/2 cup black beans, rinsed 
  • 1 cup low-sodium vegetable or chicken stock
  • 2 eggs, cooked your desired way 
  • salt and pepper to taste


What To Do:
Heat a large skillet over medium heat and add bacon. Cook until fat is rendered and bacon is crispy, then remove bacon with a slotted spoon and place on a paper towel to drain. Reduce heat to medium-low and add sweet potato, onions, pepper, and garlic to the skillet, tossing to coat. Cover and cook for 5-6 minutes, stirring once or twice, until soft.

Add uncooked quinoa to vegetables and stir for 1-2 minutes, allowing it to lightly toast. Pour in stock and bring the mixture to a boil. Immediately reduce to a simmer, cover and cook for 10 minutes. Stir in black beans, and continue to cook for five more minutes or until quinoa is cooked through. While quinoa is cooking, prepare eggs as you'd desire. Once cooked, taste and season to your liking. Serve quinoa in bowls topped with eggs and cooked bacon.


recipe adapted slightly from How Sweet It Is

Friday, August 31, 2012

Roasted Peaches with Greek Yogurt, Honey and Walnuts


If you've never browsed through Eat Live Run, please do yourself a favor and go do that right now. No, really. It's bursting with delicious recipes and gorgeous photos that will make you drool. 

Ok, are you back? Fantastic. Today I'm sharing my take on her roasted peaches! If you think it looks good, just wait until you smell and taste this delectable, pretty healthy dessert! (or breakfast, whatever)

I subbed in what I had on hand. Although I love me some goat cheese (which the original recipe calls for), I just had Greek yogurt which is still tangy and creamy! This would also work with mascarpone or even gorgonzola. 


What You'll Need:
(serves 2)
1 large ripe yellow peaches, halved
4 TBSP plain nonfat Greek yogurt
2 TBSP honey
1/3 cup roasted walnuts, chopped

Directions:
Preheat oven to 425.
Scoop out peach pits and roast peaches halved side up on a lined baking sheet for 20 minutes. Remove from oven, let cool briefly then scoop one tablespoon of Greek yogurt in the center of each peach half. Drizzle honey over the peaches and top with chopped walnuts.

Recipe adapted from Eat Live Run 
Related Posts Plugin for WordPress, Blogger...